It is ordinary for an e-commerce site to have several standard pages. Besides development pages, shop pages list products, and user accounts, checkout, and cart pages. There are even pages for user accounts, checkout flows, and carts.
The WooCommerce plugin makes it effortless to set up these sorts of items on a WordPress site since it delivers templates. You can operate it right away to form the pages. To initiate your store, you can effortlessly set up some products and your expense processing details in a few minutes. That is one of the many benefits of WooCommerce Cart Page.
There are a lot of filters and activities available in WooCommerce, so it is highly extensible. Moreover, it authorizes overriding templates in WordPress themes. However, some individuals may be unable to do that due to their lack of intermediate-level dev skillfulness.
Creating a Custom WooCommerce Cart Page in WordPress Site
SeedProd makes it effortless to build custom pages for WooCommerce stores. With SeedProd, you can construct any web page from the ground up with the most advanced drag-and-drop page builder. It contains over 180 professional-looking templates. In this type, you will discover eCommerce templates for building sales pages and lead capture pages.
Further, SeedProd is fully compatible with WooCommerce and comes with unique WooCommerce partnerships to display your top-selling items, considerable widespread items, and contemporary sales.
See Also:
In order to operate the plugin, you must foremost install and activate it.
- Follow these steps to make a fresh landing page by clicking on ‘Add New Landing Page’ in SeedProd » Landing Pages.
- The following step is to select a template for the cart page.
- There are various types of campaign templates in SeedProd, including arriving soon and 404 pages. Relying on the type of campaign, you can filter templates by clicking on the tabs at the topmost of the screen.
- Merely hover over a template and click ‘Checkmark’ to utilize it.
- Using the subsequent form, build a name for your cart page. Using the page’s title as the ground for a URL, SeedProd constructs a URL you can adjust.
- Click ‘Save and Start Editing’ when you are done filling in the information you want.
- Upon clicking this, the SeedProd page builder will occur. The editor offers a live preview on the right, and few options on the left, of your custom cart page.
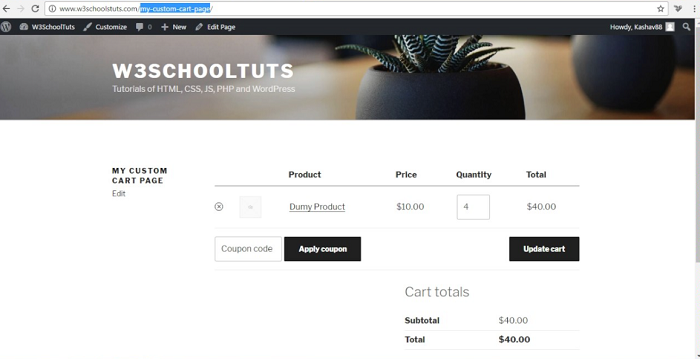
- Let’s begin by adding a picture to the top of the page. The most suitable alternative is to use an image identical to your store’s standard header, as this will assure the consistency of your branding.
- Choose the foremost layout in the ‘Choose your layout’ box if you like the header image to hide the whole cart page.
- The format will now be full-width. You can now extract the ‘Image’ block onto the layout by picking it in the left-hand menu.
- Pick the Image block to upload a picture. You can either upload a fresh image or pick an image from your library in the left-hand menu.
- The settings on the left permit you to customize the impression further. It is possible, for example, to add alt text to an image and alter its size. Click the ‘Add Columns’ icon in the section that says ‘Drag a new block here’ once you’re content with the header’s appearance.
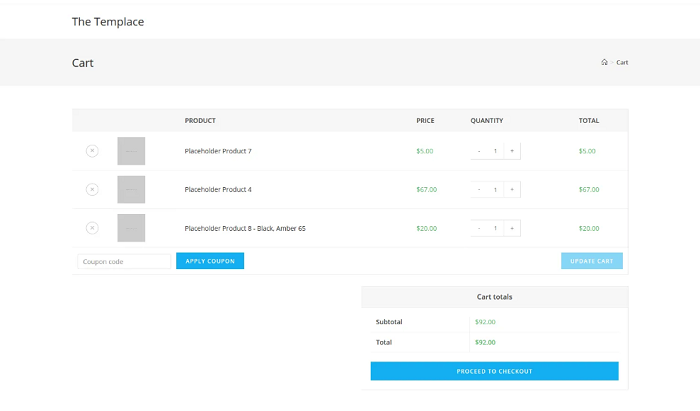
- For the central cart page area, you can select from several layouts. Select the content and sidebar layouts by clicking on them.
- In this way, you can make a section to display your cart, as well as an area to display customer testimonials.
- Scroll towards the ‘WooCommerce‘ option on the left-hand menu. To add a cart to your layout, find the ‘Cart’ block and extract it there.
- By utilizing the left-hand menu, you can modify every element of the cart. There are numerous things you can alter, such as font, colors, buttons, etc.
- It’s time to add the testimonials block after you’re comfortable with the cart area. As an effect, visitors will have more potential to conduct their purchase if they see this as social evidence.
- To add the testimonial block to your layout, simply locate and drag it there.
- You can furthermore show your testimonial with a star rating. Taking the testimonial block and dragging it beneath the ‘Star Rating’ block will do the trick.
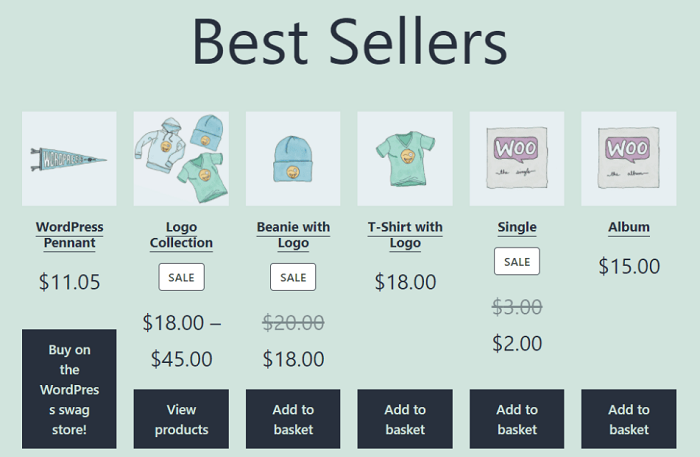
- The design of a section for famous products can encourage people to add more additional items to their shopping carts. Adding a ‘Best Selling Products’ block to your layout will support and promote your store’s most thriving products.
- The block displays your most popular yields by default, but you can also exhibit your newest products, sale products, etc. You can do this by opening the ‘Type’ dropdown and preferring a new option.
- The next step is to pick the ‘Publish’ option after you click the dropdown arrow next to ‘Save.’
- Next, you’ll need to modify the WooCommerce settings to change the cart URL. You can access this section by visiting WooCommerce » Settings and clicking on the ‘Advanced’ tab.
- Afterward, you’ll need to document the URL for your custom page in the dropdown menu under WooCommerce “Cart page.” Select the valid page when it appears, and you’re done.
See Also: Single Page Website Design vs Multiple-Page Website Design
Web Help Agency
Web Help Agency is one of the fastest-growing tech enterprises. A core crew of over twenty members resides in Poltava, Ukraine, and operations are scattered across multiple countries.
The following are some of the assistance offered by Web Help Agency:
- One of our most famous services is delivering a full-time developer for your agency.
- In order to deliver you with the most reasonably possible WooCommerce Development resolutions, they create solutions tailored to your requirements and to the most delinquent industry trends.
- Professionals from their team provide actionable insights to support you to grow your store. In addition, they will provide you with knowledge about potential prospects and results.
- You can easily migrate to WooCommerce without any bother. It is not essential to worry about active subscribers or expenditures with Web Help Agency. Their subscription migration member status makes them the authorized partner for WooCommerce Subscriptions.